Download Free Latest Software
Windows 7 USB Installation – Latest Vresion
Windows 7 USB Installation ready to breathe new life into an old PC or install Windows 7 on a fresh system? Look no further! In this comprehensive guide, we’ll walk you through the process of creating a bootable Windows 7 USB drive. Whether you’re a tech enthusiast or a curious beginner, we’ve got you covered.
Windows 7 USB Installation Overview
Windows 7 USB Installation, despite being a classic operating system, still has a loyal following. Its stability, familiar interface, and compatibility with legacy software make it a preferred choice for many users. Let’s explore its features and benefits:
Features: Windows 7 USB Installation
- User-Friendly Interface:
- Windows 7 USB Installation offers a familiar desktop experience with the iconic Start menu.
- Intuitive navigation and straightforward controls make it accessible to all.
- Stability and Performance:
- A robust foundation ensures smooth operation even on older hardware.
- Efficient resource management for everyday tasks.
- Software Compatibility:
- Many legacy applications and games run seamlessly on Windows 7 USB Installation
- Ideal for specific work scenarios or personal use.
System Requirements: Windows 7 USB Installation
Before diving into the installation process, let’s check the system requirements:
- PC & macOS:
- Compatible with both 32-bit and 64-bit systems.
- Minimum 1 GHz processor and 1 GB RAM.
- Sufficient storage space for the ISO file (around 3 GB).
- Android & iOS:
- Unfortunately, Windows 7 USB Installation doesn’t run natively on mobile devices.
- Consider using a Windows emulator if needed.
Technical Setup Details: Windows 7 USB Installation
Here’s what you need to know about the installation process:
- Software Full Name: Windows 7
- Setup File Name: Win7_32bit.iso (for 32-bit) or Win7_64bit.iso (for 64-bit)
- Full Setup Size: Approximately 3 GB
- Setup Type: Bootable USB
- Compatibility Architecture: x86 (32-bit) or x64 (64-bit)
- Latest Version Release Added On: July 8, 2024
- Developers: Microsoft Corporation
How to Install Windows 7 USB Installation
- Download Instructions:
- Visit the official Microsoft website to download the Windows 7 ISO file.
- Choose the appropriate version (32-bit or 64-bit) based on your system.
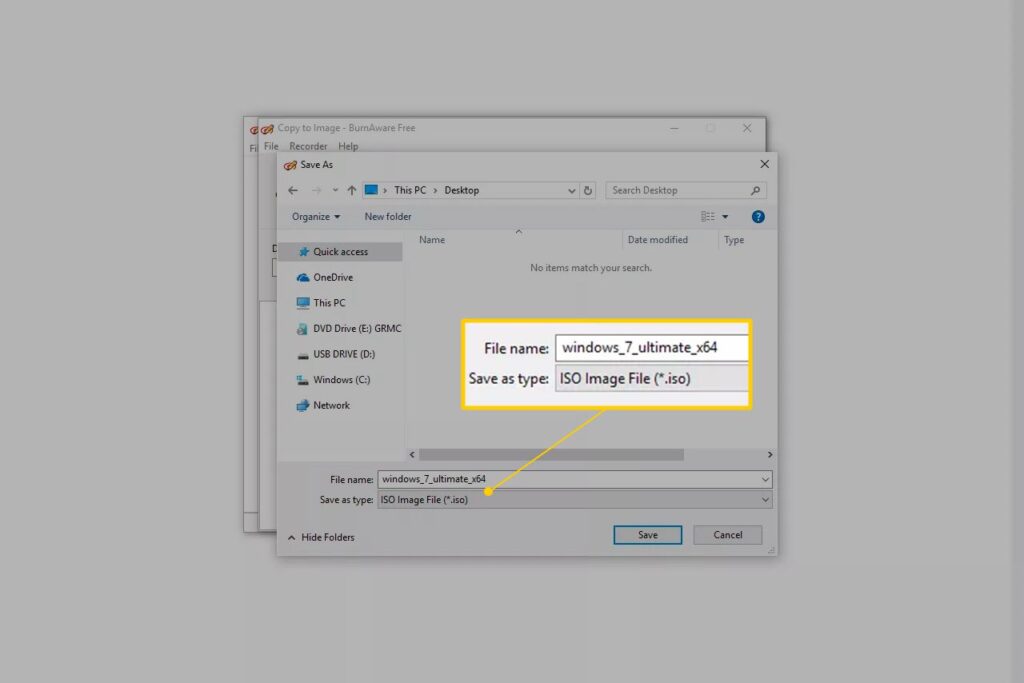
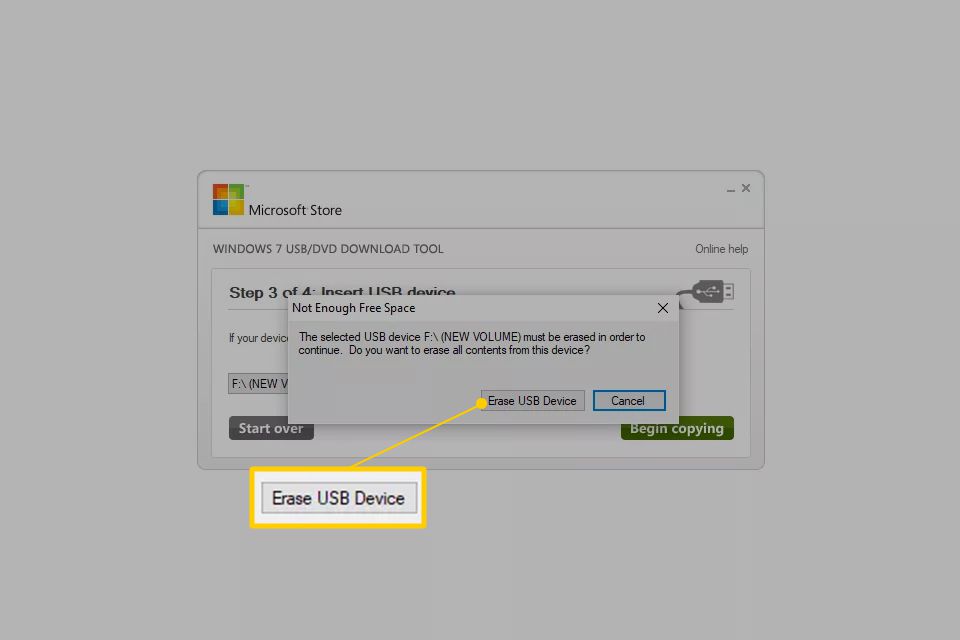
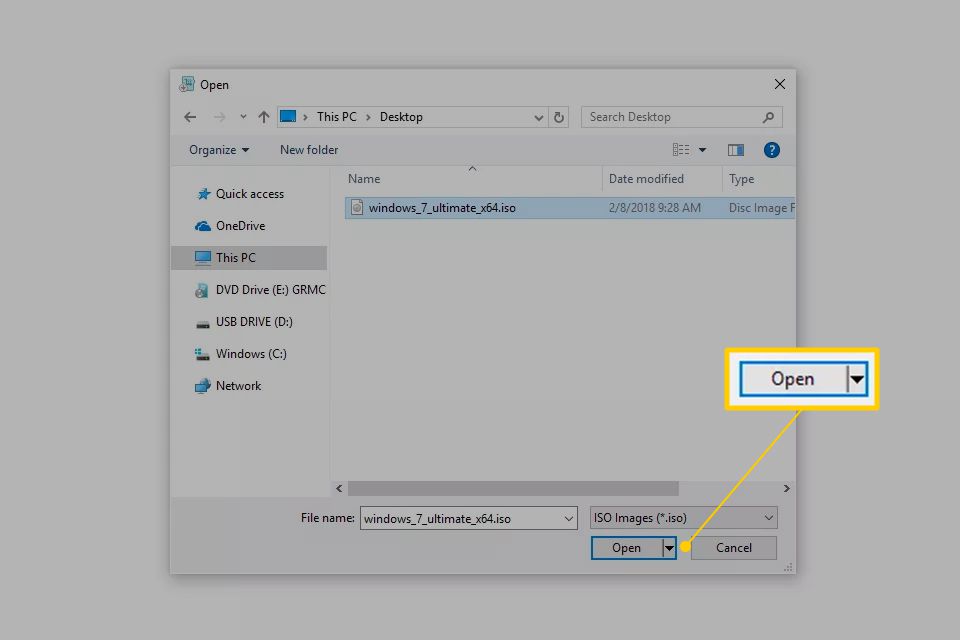
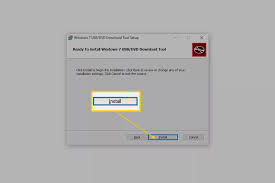
- Create a Bootable USB:
- Download and install the Windows 7 USB/DVD Download Tool.
- Run the program and select your ISO file.
- Choose the USB device option and follow the prompts to create the bootable USB drive.
- Boot from USB:
- Insert the bootable USB drive into your PC.
- Restart your computer and enter the BIOS settings (usually by pressing F2 or Del during startup).
- Set the USB drive as the primary boot device.
- Save changes and exit the BIOS.
- Install Windows 7:
- Follow the on-screen instructions during installation.
- Enter your product key when prompted.
- Customize settings (language, time zone, etc.).
- Let the installation process complete.
Conclusion
Congratulations! You’ve successfully created a Windows 7 USB installation drive. Remember to back up your data before installing the OS. Windows 7 may be vintage, but it still has its charm. So go ahead, revive that old PC, and enjoy the classic Windows experience!

Leave a Reply